Recreating YouTube
HTML and CSS at work
Introduction
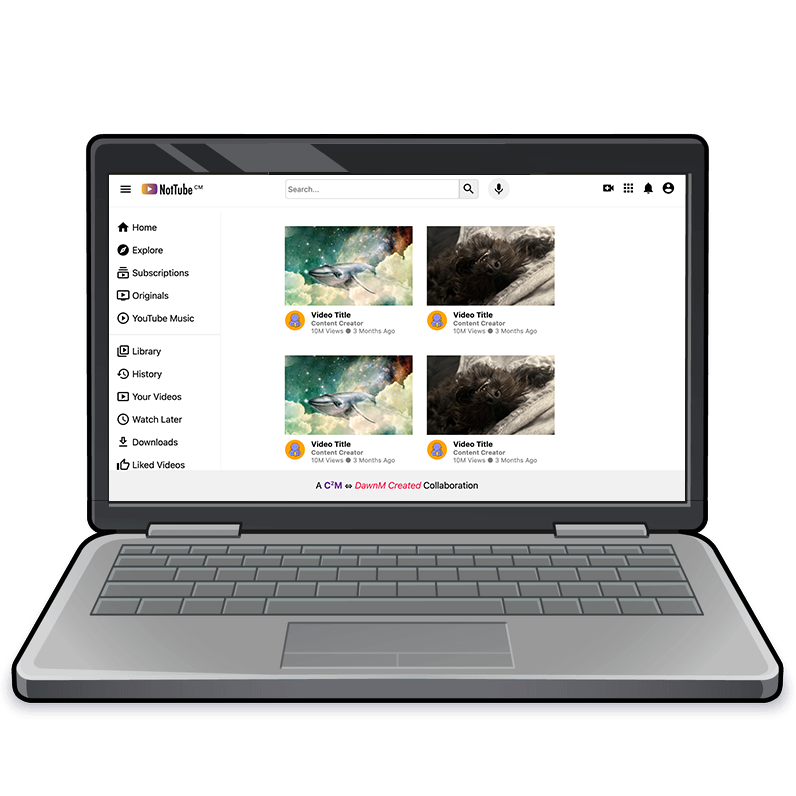
For one of our web development course projects, we were asked to tackle a challenging but rewarding task: recreating the core layout of an older version of YouTube, which we've affectionately named "NotTube." This project was a fantastic opportunity for me to flex my HTML and CSS muscles, and to really get to grips with how a complex, commercial site is structured and styled.
HTML Structure:
Building the Foundation
I began by laying out the HTML, aiming for semantic clarity to mirror YouTube's key components:
-
Header:
-
I started with the
<header>element, containing the logo, search bar, and navigation links. -
I used
<div>elements for flexible layout, allowing me to position elements precisely. - To enhance the visual cues, I integrated Material Icons from Google Fonts, which gave the header a professional, familiar feel.
-
I started with the
-
Main Content:
-
The
<main>element was crucial for encapsulating the primary content area. -
Within this, I included an
<aside>for the sidebar and a<section>for the video grid.
-
The
-
Sidebar (
<aside>):-
I structured the sidebar with
<div>elements, categorising them as "primary," "user," and "subscriptions" menus. -
Lists and links (
<a>) were used for navigation, ensuring a user-friendly experience. - Responsive Sidebar: A key feature was the responsive sidebar, which slides in and out. This was a challenge, but with the help of my partner, who is very strong with Javascript, we created a very effective feature. This feature is really important for mobile users, and really shows his skill with responsive design.
-
I structured the sidebar with
-
Video Grid (
<section>):-
<div>elements with the class "video-card" were used to represent individual video previews. - "video-thumbnail" and "video-info" classes were used to organise video details, making the code more readable.
-
Images and text elements (
<h3>,<h4>,<p>) were used to display video information in a clear, concise way.
-
-
Footer:
-
The
<footer>element contained the collaboration credits, highlighting the joint effort on this project. - I used inline styling to make the collaborator names stand out.
-
The
CSS Styling:
Replicating the Visuals
The CSS part of the project was about replicating YouTube's familiar aesthetic:
-
Global Styles:
-
I started by resetting margins and padding, and using
box-sizing: border-boxfor predictable layout. - A system font stack was applied for cross-platform consistency.
-
I started by resetting margins and padding, and using
-
Header Styling:
-
flexboxwas my go-to for creating a flexible and aligned layout. - Fixed positioning ensured the header remained visible during scrolling.
-
A subtle
border-bottomprovided visual separation.
-
-
Sidebar (
<aside>) Styling:- A fixed width and absolute positioning were used to create the sidebar.
-
Transition effects (
transition: left 0.3s ease-in-out;) were used to create smooth sliding animations. - The Javascript adds and removes the class "active" to the aside element, and the section element, in order to slide the menu in and out, and to shift the content to make room for the menu.
-
Video Grid (
<section>) Styling:-
flexboxandflex-wrapwere used to create a responsive grid layout. - Video cards were styled with fixed widths and margins.
- Thumbnail images and video information were styled for visual clarity.
-
-
Footer Styling:
- Fixed positioning and a background colour were used to create a distinct footer area.
- Styling for the collaborator's names highlighted the partnership.
-
Responsiveness:
- Media queries were used to adjust the header layout for smaller screens.
Key Takeaways
This project was a fantastic learning experience, demonstrating the power of HTML and CSS in recreating complex web interfaces. The combination of structural HTML, stylistic CSS, and the responsive coding of my partner, resulted in a very effective clone of an older version of the YouTube homepage. For my portfolio, this project highlights my ability to tackle complex layouts, and work effectively with others.
- Semantic HTML: Using appropriate HTML elements improved accessibility and maintainability.
- Flexbox: Flexbox proved to be an essential tool for creating flexible and responsive layouts.
- Material Icons: Google's Material Icons provided a consistent and recognisable visual language.
- Responsiveness: Media queries were crucial for adapting the layout to different screen sizes.
- Collaboration: Combining design and technical expertise led to a polished and functional product.
- Javascript: Javascript made the responsive sidebar functional.
Conclusion
This project was a fantastic learning experience, demonstrating the power of HTML and CSS in recreating complex web interfaces. The combination of structural HTML, stylistic CSS, and the responsive coding of my partner, resulted in a very effective clone of an older version of the YouTube homepage. For my portfolio, this project highlights my ability to tackle complex layouts, and work effectively with others.

